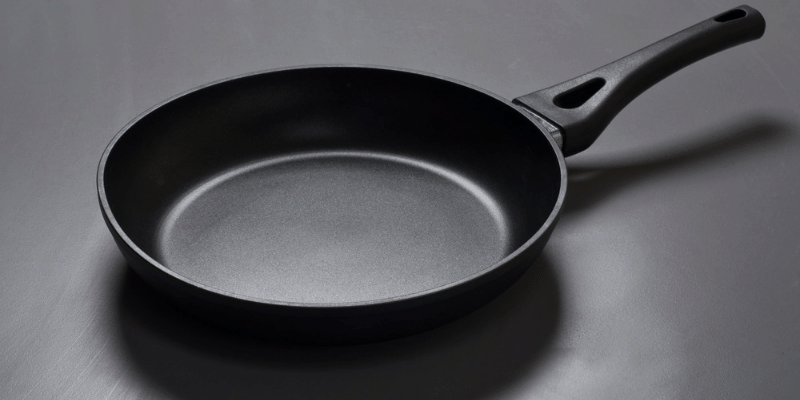
Non-stick pans are great if you’re looking for a quick clean-up, but their non-stick features are bound to decay over time.
Most people don’t clean their pans properly and don’t give them the proper attention they need, which increases the deterioration process.
If your non-stick pans or pots have scratches or stains on the surface, it will only make the non-stick quality less effective.
If you just got a non-stick pan and its quality is already declining – worry no more.
Yes, non-stick pans can be recoated. There are several ways to re-coat your non-stick pans, simply by cleaning and seasoning them.
These methods will get rid of all the scratches and stains and make your pan look brand new.
Re-coating your pans by seasoning and cleaning them is a much better idea than getting a brand-new pan, as it will save you money!
If you’re looking to replace your non-stick pan, I recommend checking out the amazing Blue Diamond toxin-free non-stick pan. You can find it in different sizes with and without lids.
Read ahead to learn more about why you should season your non-stick cookware and how you should season them.
How to Re-coat a Non-Stick Pan
There are different ways to re-coat a non-stick pan and restore it as new.
The most common ones are spraying them or using various oils to coat them with a layer on the surface.
Seasoning with Peanut Oil
Before seasoning your pan, it is essential to clean it thoroughly, so no stains are left behind.
You can do this by simply adding water, 2 tablespoons of baking soda, and ½ cup of white vinegar to the pan.
After this, apply heat to the bottom of the pan, which will cause the vinegar and baking soda to turn into a mixture.
After ten to fifteen minutes, you can stop applying heat to the pan.
The next step is to wash the pan by cleaning it and wiping it. Wash it with soap and dry it by gently rubbing it with a cloth.
Always keep harsh products and tools away from the pan’s surface because they can further damage the surface and your pan’s seasoning.
Always remember to wipe the pan before seasoning it.
After you’re done cleaning it, apply a thin layer of peanut oil to the surface of your pan to fill the pores and keep the non-stick elements effective.
After you’re done applying oil to the surface, apply heat to the bottom of the pan for about 60 to 120 seconds.
After the surface dries and is cool enough, make sure to wipe any oil that is dripping. The next step is to use a gentle sponge to wash the pan.
You can repeat this process every six months, but if you put your cookware in the dishwasher, you might have to do it every four months.
Seasoning with Coconut Oil
The first step is to apply heat to the bottom of the pan. Don’t apply too much heat – you don’t want to burn yourself when applying oil to it.
Let it warm on the stove for a while. While the pan is on the stove, preheat your oven to 300 to 350 degrees.
The next step is to apply coconut oil to the pan’s surface. Make sure to fill in all pores, but do not apply a thick layer of oil.
The layer should be around 1.27 inches high. After applying the coconut oil, heat the pan in the oven for at least two hours.
The heat from the oven will let the coconut oil bake and thoroughly coat the surface of your pan or pot.
Make sure not to expose your pan to too much heat because it could have dangerous effects. After two hours, turn the oven off but don’t remove the pan from the oven.
Let it stay in the oven overnight so the oil can dry. After a whole day, you can remove your non-stick pan and start using it.
Seasoning in the Oven
You can even season your pans by keeping them in the oven. Preheat the oven to 400° F.
Remember – don’t increase the oven’s heat to above 500 degrees Fahrenheit, or it might end up damaging your pan.
Non-stick pans can’t take severe heat, and the process might end up costing you more than just your pan.
The pan is supposed to stay in the oven for at least 60 minutes. Once the time is up, the next step is to remove the pan and wipe excess oil from the pan before it starts dripping.
A tip to keep in mind while seasoning your pans is to avoid using olive oil.
Olive oil has a low smoke point, so it will start smoking when you put your pan for seasoning in the oven.
Under severe heat (either in the oven or on the stove), olive oil can start to smoke, which can be potentially dangerous for you and your family.
Also, avoid other oils and butter that have a low smoke point to season your pans because they might end up causing damage to your pan and oven.
Peanut oil is the most preferred oil for seasoning a non-stick pan because it has a very high smoke point.
Spraying the Surface of the Pan
This is a very common process and doesn’t require much time or effort. Apply a non-stick coating spray to the surface of your pan.
The next step is to let the spray dry for a few hours before you can use it again.
You can also get a professional to re-coat your pan if you don’t have the resources or time to do it at home.
Try these effective and time-saving methods today if you want to make the most of your cookware!
Why Should You Season Your Non-stick Pans?
Seasoning is a simple process in which vegetable oil is applied to the surface of the pan and then subjected to extreme heat so that it submerges into the pan, making it non-stick.
Cast-iron pans and pots are usually seasoned to put a protective layer, which will keep the food fresh and keep the pan from rusting.
Carbon steel pans and pots are also seasoned to prevent the food from sticking to the surface of the pan and keeping it clean.
It may sound absurd to season or re-coat a non-stick pan as they are designed to prevent the food from sticking to the pan’s surface.
But here’s the thing – non-stick pans, like any other cookware, deteriorate over time and tend to lose their non-stick abilities.
It does not make sense to buy new pans every time, so the simpler and cheaper solution is to simply re-coat them all over again.
This process is simple, but you’ll have to do it more than once.
Every time your pan loses its non-stick effect, make sure to season it, and it will seem brand new again.
It is advised to season them every 6 months as that will increase the lifespan of your non-stick pan.
A huge sign indicating it’s time to season your non-stick cookware is food sticking to the pan’s surface.
Washing away stuck food is harder and can damage the coating of your pan.
So, if you’re looking to save money and easily fix your pans at home, this is the solution for you.
What You Need to Know About Seasoning Your Pans
You can easily season your pans at home, but it’s a day’s job.
The process includes coating the pan with oil, heating it, and letting it cool down. Once that is done, the entire process has to be repeated again.
It is entirely up to you to decide the number of times you want to repeat the process, but remember that the more times you repeat it, the longer the seasoning will last.
Always remember to use a thin coat of oil on the surface of your non-stick pan. Adding too much oil will only manage to make your pot sticky and you’ll just have to start all over again.
This will waste not only your precious time but also your vegetable oil. So, make sure to use a very thin layer of oil to cover the whole surface of your non-stick cookware.
If you believe the coating will make a mess in your oven, place a baking sheet or a foil underneath the pan to prevent the oil from getting everywhere.
The ideal time to let the pot stay in the oven is 60 to 65 minutes. After taking it out, let it cool for at least 120 to 130 minutes.
Make sure to be careful when touching the pan – it will be extremely hot, so always wear gloves while dealing with non-stick pans straight out of the oven.
If you have a lot of time and want a perfect thick coating, you can even re-coat your pan SIX times. Most people prefer 2 to 3 coatings, which is perfectly fine, too.
Don’t forget that you’ll have to do this process every six months to keep your pan clean and its non-stick ability effective.
When the seasoning starts to look worn out or the food starts sticking to your pan – don’t worry.
It’s just time to season it again. Simply wash your pan or pot with warm water, rub soap on it lightly with a brush, and season it again.
If your cookware has rust, make sure to remove the rust first. Rust can easily transfer to your food, which can be potentially harmful to you and your family.
You can use steel wool to remove it or let the pan soak in water and vinegar or try to scrub the rust away with salt and a potato.
After you’re sure the rust is removed, you can start the process of re-coating your pan.
After re-coating or seasoning your pan, your pan will look shinier.
Rust, grease, and scratches will fade. Stains will also disappear, which will restore your non-stick pans and make your pans look brand new.
You may also like the following articles:
- Do Pans Need to Be Sanitized?
- What to Do When the Non-Stick Pan Coating Is Coming Off?
- When and How to Recycle Your Frying Pans?
- Are Teflon Pans (Non-stick Pans) Bad For You?
- How to Check If a Pan is Non-Stick?
- How to Remove Cooking Spray Residue From Pans?
- How to Make a Pan Non-Stick with Salt?
- Do Non-Stick Pans Need Oil?